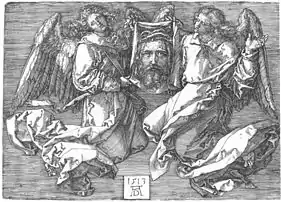
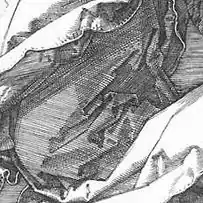
Hatching
Hatching (hachure in French) is an artistic technique used to create tonal or shading effects by drawing (or painting or scribing) closely spaced parallel lines. (It is also used in monochromatic heraldic representations to indicate what the tincture of a "full-colour" emblazon would be.) When lines are placed at an angle to one another, it is called cross-hatching.
Hatching is especially important in essentially linear media, such as drawing, and many forms of printmaking, such as engraving, etching and woodcut. In Western art, hatching originated in the Middle Ages, and developed further into cross-hatching, especially in the old master prints of the fifteenth century. Master ES and Martin Schongauer in engraving and Erhard Reuwich and Michael Wolgemut in woodcut were pioneers of both techniques, and Albrecht Dürer in particular perfected the technique of crosshatching in both media.
Artists use the technique, varying the length, angle, closeness and other qualities of the lines, most commonly in drawing, linear painting and engraving.
Technique
The main concept is that the quantity, thickness and spacing of the lines will affect the brightness of the overall image and emphasize forms creating the illusion of volume. Hatching lines should always follow (i.e. wrap around) the form. By increasing quantity, thickness and closeness, a darker area will result.
An area of shading next to another area which has lines going in another direction is often used to create contrast.
Line work can be used to represent colors, typically by using the same type of hatch to represent particular tones. For example, red might be made up of lightly spaced lines, whereas green could be made of two layers of perpendicular dense lines, resulting in a realistic image.
Crosshatching is the technique of using line to shade and create value. Before one can apply this technique to a drawing, there must be a basic understanding of the structure of crosshatching. To make the basic structure, start by drawing four boxes side-by-side and label them 1-4. Starting in box 1, repeatedly draw a parallel line that goes through to box 4. Next, starting in box 2, repeatedly draw a parallel line that goes in the opposite direction of the parallel lines in box 1, continuing through to box 4. Next, starting in box 3, repeatedly draw a straight line that goes through to box 4. Lastly, in box 4, repeatedly draw a horizontal line. The idea here is that after each box, another layer of a line is added to each box as you go, slowly building on each other, and therefore, adding value and shading through line work.
Variations
- Linear hatching
- Hatching in parallel lines. Normally the lines follow the direction of the described plane.[1]
- Crosshatching
- Layers of hatching applied at different angles to create different textures and darker tones. At its simplest, a layer of linear hatching is laid over another layer at a 90° angle, to which further diagonal layers may be added. Other methods include layering arbitrary intersecting patches.[1] Crosshatching in which layers intersect at slight angles can create a rippled moiré effect.[2]
- Contoured hatching
- Hatching using curved lines to describe light and form of contours.[2]
Representation of materials
In technical drawing, the section lining [3] may indicate the material of a component part of an assembly. Many hatching patterns have been standardized by the American National Standards Institute (ANSI) and the International Standards Organization (ISO), though there are many other predefined patterns that may be used. Thus, the hatching pattern of steel varies from that of aluminum, copper, etc. The hatching patterns are not only for metals. Patterns for grass, gravel, brick, and others are frequently found on architectural drawings.
References
- South 2009, p. 132.
- South 2009, p. 133.
- American National Standard for Section Lining ANSI Y14.2M-1979 (R1987)
Works cited
South, Helen (2009). The Everything Drawing Book. Everything Books. ISBN 978-1-60550-446-9.CS1 maint: ref=harv (link)


_Philadelphia_PA_(AD5)_00005a.jpg.webp)