Track geometry car
A track geometry car (also known as a track recording car) is an automated track inspection vehicle on a rail transport system used to test several parameters of the track geometry without obstructing normal railroad operations. Some of the parameters generally measured include position, curvature, alignment of the track, smoothness, and the crosslevel of the two rails. The cars use a variety of sensors, measuring systems, and data management systems to create a profile of the track being inspected.
History
Track geometry cars emerged in the 1920s when rail traffic became sufficiently dense that manual and visual inspections were no longer practical. Furthermore, the increased operating speeds of trains of that era required more meticulously maintained tracks. In 1925, the Chemins de fer de l'Est put a track geometry car into operation carrying an accelerograph developed by Emile Hallade, the inventor of the Hallade method. The accelerograph could record horizontal and vertical movement as well as roll. It was fitted with a manual button to record milestones and stations in the record. Such car was developed by travaux Strasbourg now part of GEISMAR Group. By 1927 the Atchison, Topeka and Santa Fe Railway had a track car in operation followed by the Estrada de Ferro Central do Brasil in 1929. These two cars were built by Baldwin using the gyroscope technology of Sperry Corporation.[1]
The first track geometry car in Germany appeared in 1929 and was operated by Deutsche Reichsbahn. The equipment for this car came from Anschütz in Kiel, a company currently owned by Raytheon. In Switzerland, the first track geometry recording equipment was integrated in an already existing dynamometer car in 1930.[1]
One of the earliest track geometry cars was Car T2 used by the U.S. Department of Transportation's Project HISTEP (High-Speed Train Evaluation Program). It was built by the Budd Company for Project HISTEP to evaluate track conditions between Trenton and New Brunswick, NJ, where the DOT had established a section of track for testing high-speed trains, and accordingly, the T2 ran at 150 miles per hour or faster.[2]
Many of the first regular service geometry cars were created from old passenger cars outfitted with the appropriate sensors, instruments, and recording equipment, coupled behind a locomotive.[3] By at least 1977, self-propelled geometry cars had emerged. Southern Pacific's GC-1 (built by Plasser American) was among the first and utilized twelve measuring wheels in conjunction with strain gauges, computers, and spreadsheets to give managers a clear picture of the condition of the railroad.[4] Even in 1981, the Encyclopedia of North American Railroads considered this the most advanced track geometry car in North America.[5]
Advantages
Track inspection was originally done by track inspectors walking the railroad and visually inspecting every section of track. This was hazardous as it had to be done while trains were running. It was also manpower intensive, and inspectors were limited in the amount of track they could inspect on a given day. Manual instruments had to be used to measure various parameters of the track.[3]
The primary benefits of track geometry cars are the time and labor saved when compared to doing manual inspections of track. Track geometry cars may travel up to 217 miles per hour (335 kilometers per hour), inspecting track the whole time. More commonly, on freight railroads, geometry cars travel at track speed (up to 70 miles per hour) to minimize service disruptions. Current track geometry cars may cover large portions of the system in a single day. Many times, maintenance gangs will follow the geometry car and fix defects as the geometry car moves along the track.[3]
Because track geometry cars are full-sized rail cars (with the exception of some lighter hi-rail geometry cars), track geometry cars also provide a better picture of the geometry of the track under loading (compared to manual methods which did not consider this). Finally, track geometry data is generally stored and can be used to monitor trends in the degradation of track. This data can be used to pinpoint and predict trouble spots in the track and plan maintenance programs accordingly.[6]
Parameters measured
The tolerances of each parameter varies by the track class of the track being measured. In the United States, geometry cars generally classify each defect as either "Class II" or "Class I" (though the exact name may vary by the railroad). A class II defect is known as a maintenance level defect, meaning that the track doesn't meet a particular railroad's own standards. Each railroad has their own standard for a maintenance level defect. A class I defect is a defect in violation of the Federal Railroad Administration's (FRA) track safety standards. Railroads must fix these defects within a certain period of time after their discovery or else they risk being fined.
- Alignment – "Alignment is the projection of the track geometry of each rail or the track center line onto the horizontal plane," (FRA Definition).[7] Also known as the "straightness" of the tracks.
- Crosslevel – The variation in cant of the track over the length of a predetermined "chord" length (generally sixty-two feet). On straight or tangent track, ideally there should be no variation, while on curves, a cant is generally desired.
- Curvature – The amount by which the rail deviates from being straight or tangent. The geometry car checks the actual curvature (in degree of curvature) of a curve versus its design curvature.
- Overhead lines (or catenary) – Measures the height and stagger of contact wire, the position of catenary masts or poles, and the positions of the wire bridges if applicable.[8]
- Track gauge – The distance between the rails. Over time, rail may become too wide or too narrow. In North America and most of the world, standard gauge is 4 ft 8 1⁄2 in (1,435 mm).
- Rail profile – Looks for rail wear and deviations from standard profile.
- Warp – The maximum change in crosslevel over a predetermined chord length (generally sixty-two feet).[9]
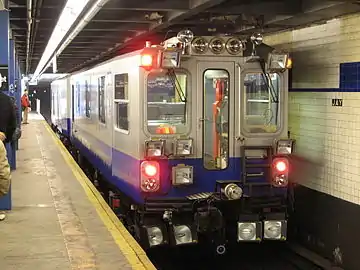
Track geometry cars used by the New York City Subway also measure:
- Corrugation of running rail surface
- Tunnel and station platform clearances
- Third rail height and gauge
- Vertical gap between third rail and protective board[10]
Non-contact measurement and inspection methods
- Laser measurement systems – Measures rail profile and wear, crosslevel, and track gauge
- Accelerometers
- Used measuring measure alignment by finding the acceleration in a certain direction and then integrating until a position is obtained. These positions are then used to create artificial chords to measure various parameters.
- Used to obtain ride quality measurements. If certain accelerations are reached or exceeded freight can be damaged or passengers may become uncomfortable.
- Video system – Captures video of the right-of-way for further analysis, as well as for machine vision inspections of certain track components
- Gyroscope – Oriented in the vertical direction, used to measure cross level and warp. These are now obsolete, having been replaced by laser measurement systems.[2]
- Proximity sensor – Used to measure surfaces, alignment, and gauge. These are now obsolete, having been replaced by laser measurement systems.[2]
Contact measurement and inspection methods
- Measuring wheels – Mostly obsolete, originally used for measuring nearly all parameters, these have now been replaced by lasers
- Strain gauges – Used in conjunction with the measuring wheels to translate the various movements of the measuring wheels into a usable format
Regulatory compliance in the United States
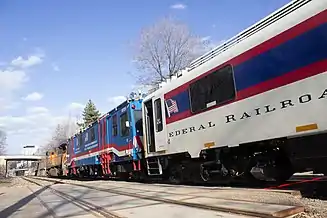
In the United States, the Federal Railroad Administration (FRA) maintains a fleet of three geometry cars as part of its Automated Track Inspection Program (ATIP). The FRA runs its fleet of geometry cars around the country to check railroads for compliance with Federal Track Safety Standards (FTSS). According to the FRA, each geometry car travels approximately 30,000 miles and finds approximately 10,000 defects every year, which are then fixed by the railroads.[11]
Future
In the United States, railroads are looking into new ways to measure geometry that cause even less interference to train operations. The Transportation Technology Center, Inc. (TTCI) in Pueblo, Colorado, has been conducting tests using a portable ride quality monitoring system attached to a standard freight car. TTCI has also been promoting a move to "Performance Based Track Geometry" or PBTG. Most current track geometry systems only look at the condition of the track itself, while a PBTG system also looks at vehicle dynamics caused by track conditions.[12]
Examples
- United States – Federal Railroad Administration DOTX-216, -217, -218, -219, -220
 France – SNCF TGV Iris 320
 Germany – ICE S
 Japan – Doctor Yellow
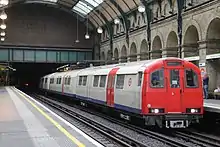
 United Kingdom – New Measurement Train, British Rail Class 950, London Underground Track Recording Train
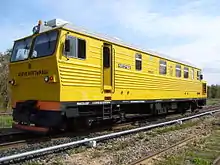
 Kazakhstan – SVGP-1
 Turkey – TCDD HT80001 (for high speed electric sections only) in
.svg.png.webp) Australia – Standard gauge AK track recording cars
Australia – Standard gauge AK track recording cars
See also
References
- "L'inspection automatique des voies de chemins de fer". Bulletin technique de la Suisse romande (in French). 1941. doi:10.5169/seals-51326.
- Lindgren, P.W. (1968). "Project HISTEP". Proceedings of the 1968 Annual Convention. American Railway Engineering Association (AREA).
- Solomon, Brian (2001). Railway Maintenance: The Men and Machines That Keep the Railroads Running. St. Paul, MN: MBI Publishing Company.
- Percy, Richard A. (2008). "SP Track Geometry Car GC 1". My Espee Modelers Archive. Retrieved 22 October 2009.
- Hubbard, Freeman H. (1981). Encyclopedia of North American Railroading. McGraw-Hill, Inc.
- Middleton, William; Smerk, George; Diehl, Roberta (2007). "Track Inspection". Encyclopedia of North American Railroads. Bloomington, IN: Indiana University Press.
- Federal Railroad Administration (2009). "Track Safety Standards Compliance Manual". Archived from the original on 2009-07-02.
- Plasser American Corporation (2007). "Machines – Recording". Plasser American. Archived from the original on 2010-01-30. Retrieved 19 October 2009.
- Uzarski, Dr. Don (2009). CEE 409 – Railroad Track Engineering, Class Notes. University of Illinois at Urbana-Champaign.
- "New York City Transit's Wonder Train Car!". MTA (New York City).
- "Automated Track Inspection Program". U.S. Federal Railroad Administration. 2009. Archived from the original on 2009-10-22. Retrieved 1 November 2009.
- "Performance Based Track Geometry" (PDF). Transportation Technology Center, Inc. 2009. Archived from the original (PDF) on 2011-07-07. Retrieved 19 October 2009.
External links
| Wikimedia Commons has media related to Track geometry machines. |