Bismarck-class battleship
The Bismarck class was a pair of fast battleships built for Nazi Germany's Kriegsmarine shortly before the outbreak of World War II. The ships were the largest and most powerful warships built for the Kriegsmarine; displacing more than 41,000 metric tons (40,000 long tons) normally, they were armed with a battery of eight 38 cm (15 in) guns and were capable of a top speed of 30 knots (56 km/h; 35 mph). Bismarck was laid down in July 1936 and completed in September 1940, while her sister Tirpitz's keel was laid in October 1936 and work finished in February 1941. The ships were ordered in response to the French Richelieu-class battleships. They were designed with the traditional role of engaging enemy battleships in home waters in mind, though the German naval command envisioned employing the ships as long-range commerce raiders against British shipping in the Atlantic Ocean. As such, their design represented strategic confusion that dominated German naval construction in the 1930s.
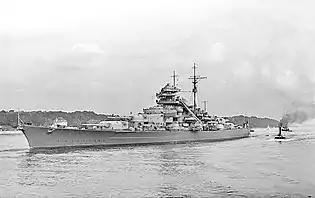 Bismarck in 1940 | |
| Class overview | |
|---|---|
| Name: | Bismarck-class battleship |
| Operators: | Kriegsmarine |
| Preceded by: | Scharnhorst class |
| Succeeded by: | H class (planned) |
| Built: | 1936–1941 |
| In commission: | 1940–1944 |
| Completed: | 2 |
| Lost: | 2 |
| General characteristics | |
| Type: | Fast battleship |
| Displacement: | |
| Length: | |
| Beam: | 36 m (118 ft 1 in) |
| Draft: | 9.30 m (30 ft 6 in) standard[lower-alpha 1] |
| Installed power: | |
| Propulsion: |
|
| Speed: | 30 knots (56 km/h; 35 mph) |
| Range: |
|
| Complement: |
|
| Armament: |
|
| Armor: | |
| Aircraft carried: | 4 × Arado Ar 196 |
| Aviation facilities: | 1 double-ended catapult |
Both ships had short service careers. Bismarck conducted only one operation, Operation Rheinübung, a sortie into the North Atlantic to raid supply convoys sent from North America to Great Britain. During the operation, she destroyed the British battlecruiser HMS Hood and damaged the new battleship Prince of Wales in the Battle of the Denmark Strait. Bismarck was defeated and sunk in a final engagement after a three-day chase by the Royal Navy. Disagreements over the cause of the sinking persist with chiefly British sources claiming responsibility for the sinking of the ship. Evidence reviewed by Robert Ballard and James Cameron indicates that her loss was most likely due to scuttling as originally claimed by her surviving crew-members.
Tirpitz's career was less dramatic; she operated in the Baltic Sea briefly in 1941 before being sent to Norwegian waters in 1942, where she acted as a fleet in being, threatening the convoys from Britain to the Soviet Union. She was repeatedly attacked by the Royal Navy and Royal Air Force between 1942 and 1944, but she was not seriously damaged in these attacks. In 1944, Lancaster bombers hit the ship with two Tallboy bombs, which caused extensive internal damage and capsized the battleship. Tirpitz was broken up for scrap between 1948 and 1957.
Design
A series of conceptual designs was begun by the Reichsmarine (Navy of the Realm) in 1932 to determine the ideal characteristics of a battleship built to the 35,000 long tons (36,000 t) limit of the Washington Naval Treaty. These early studies determined that the ship should be armed with eight 33 cm (13 in) guns, have a top speed of 30 knots (56 km/h; 35 mph), and have strong armor protection.[2] At the time, the German Navy was constrained by the terms of the Treaty of Versailles that had ended World War I, which restricted battleships to a maximum displacement of 10,000 long tons (10,000 t). The sketch design for what became the Bismarck class was produced by the Construction Office in 1933 and the final design agreed 1936.[3][4] Ministerial advisor Hermann Burckhardt was responsible for the project, and he later supervised the launching of Tirpitz.[5] During this period, the naval leadership grappled with a variety of problems, including the strategic and operational use of such a ship and the preferred propulsion system. War games suggested that the new battleships could be used both to attack French shipping at long range and to fight in a traditional battle against the French and Polish navies, then seen as the most likely threats.[6] Due to the numerical inferiority of the German fleet and the assumption that naval battles would take place at relatively close range in the North Sea, the design staff placed great emphasis on stability and armor protection. Very thick vertical belt armor was adopted, along with heavy upper-citadel armor plating and extensive splinter protection in the bow and stern of the ships.[7]

The Reichsmarine learned in June 1934 that Italy had decided to build a pair of 35,000-ton battleships armed with 35 cm (14 in) guns, which would surely provoke the construction of similar ships for the French fleet. To keep pace with their French rivals, the next two battleships built by Germany would need to be of a similar size and armament. At the same time, Germany was preparing to begin negotiations with Great Britain to secure a bilateral naval agreement that would effectively abrogate the naval restrictions of the Versailles treaty. In exchange, Germany would limit its fleet to a third the size of the Royal Navy. With the construction of at least two 35,000-ton battleships within reach, the German naval design staff began work in late October to lay out requirements for armament, armor, and speed. A preliminary design was completed in November, which resulted in a ship armed with eight 33 cm guns in four twin gun turrets, protected by an armored belt that was 350 mm (14 in) thick, and capable of a top speed of 30 knots (56 km/h; 35 mph). The staff noted that such a ship would likely exceed the 35,000-ton limit, so triple or quadruple turrets should be considered to reduce the weight.[8]
The design staff had decided that four twin turrets would provide the best solution to distribution of the main battery, as it would provide equal firepower forward and aft, as well as simplify fire control. This arrangement was similar to the last German battleships of the Imperial period, the Bayern class. The similarity led to speculation that the Bismarcks were essentially copies of the earlier ships, though the arrangement of the main battery along with a three-shaft propulsion system were the only shared traits.[9] As design work continued into January 1935, Generaladmiral (General Admiral) Erich Raeder, the commander of the Reichsmarine, met with the various department and section leaders to refine the design requirements. The Naval Ordnance Department argued for an increase to 35 cm guns to keep parity with the expected Italian and French ships, which Raeder approved on 19 January. Another meeting in March saw the Ordnance Department raise the possibility of increasing the projected main battery again to 38 cm (15 in), though Raeder initially rejected the idea owing to the significant increase in displacement. Nevertheless, though he formally approved the 35 cm version on 1 April, he allowed for the option to increase the main battery depending on foreign developments. Just a month later, Raeder decided to adopt the larger gun on 9 May, largely the result of Chancellor Adolf Hitler's preference for the 38 cm gun.[10]
In June 1935, Germany signed the Anglo-German Naval Agreement, which allowed Germany to build battleships at a ratio of 35 percent to the total tonnage of the Royal Navy;[11] this granted Germany effective parity with France, at least in terms of allotted tonnage.[12] It also made Germany party to the international treaty system begun at the Washington Conference.[2] By this time, the only significant issue to be settled was the propulsion system, which was largely dependent on strategic questions. Many senior officers in the navy envisioned using the Bismarck class in the Atlantic Ocean, which would require a long cruising range.[13] The naval constructors examined diesel engines, steam turbines, and turbo-electric drive engines; the last system was the preferred choice, as it had been extremely successful in the two American Lexington-class aircraft carriers and the French passenger ship Normandie.[9] The design staff were also required to provide sufficient range to the new battleships; they would have to make long voyages from German ports to reach the Atlantic, and Germany had no overseas bases where the ships could refuel.[14] Raeder ordered the turbo-electric engines for the new ships, but the contracting manufacturer, Siemens-Schuckert, could not meet the navy's requirements and removed itself from the project less than a month before construction on Bismarck began, forcing the navy to revert to high-pressure steam turbines.[15]
The displacement of Bismarck and Tirpitz was ultimately limited by the capabilities of existing infrastructure in Kiel and Wilhelmshaven, and the Kaiser Wilhelm Canal, rather than international agreements. On 11 February 1937, the Construction Office informed Raeder that the ships could not displace more than 42,000 long tons (43,000 t) due to harbor constraints and canal depths. The office also expressed a preference for building a third vessel and remaining within the 35,000-ton treaty limit.[16] Admiral Werner Fuchs, the head of the General Command Office of the Oberkommando der Marine, advised Raeder and Hitler that modifications would be necessary to reduce the displacement to ensure the new ships met the legal requirements of the London Naval Treaty. Japan refused to sign the new treaty, and so on 1 April 1937 an escalator clause permitting treaty signatories to build ships up to a limit of 45,000 long tons (46,000 t) went into effect. The final design displacement of 41,400 long tons (42,100 t) was well within this limit, so Fuchs's modifications were discarded.[17]
Even though Raeder and other senior naval officers envisioned using Bismarck and Tirpitz as commerce raiders against first French and later British shipping in the Atlantic, and in fact used them in that role during World War II, the ships were not designed for that mission. Their steam turbines did not afford the necessary cruising radius for such a role, and many of the decisions made for the ships' armament and armor layout reflect the expectation to fight a traditional naval battle at relatively close range in the North Sea. The disconnect between how Bismarck and Tirpitz were designed and how they were ultimately used represents the strategic incoherence that dominated German naval construction in the 1930s.[7][18]
General characteristics
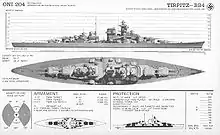
The Bismarck-class battleships were 251 m (823 ft 6 in) long overall and 241.60 m (792 ft 8 in) long at the waterline. The ships had a beam of 36 m (118 ft 1 in), and a designed draft of 9.30 m (30 ft 6 in); the draft at standard displacement was 8.63 m (28 ft 4 in), and 9.90 m (32 ft 6 in) at a full load. The ships had a designed displacement of 45,950 metric tons (45,220 long tons); Bismarck's standard displacement was 41,700 t (41,000 long tons), and when fully laden, the ship displaced 50,300 t (49,500 long tons). Tirpitz was heavier, displacing 42,900 t (42,200 long tons) and 52,600 t (51,800 long tons), respectively. The ships had a double bottom for 83 percent of the length of the hull, and twenty-two watertight compartments. The ships were 90 percent welded construction.[4] The stern was weakly constructed; this had significant consequences on Bismarck's only combat mission.[19] The building cost of Bismarck was 196 million Reichsmarks, while Tirpitz was slightly cheaper at 191.6 million Reichsmarks. Both ships had seven searchlights.[20]
The ships were very stable, primarily because of their wide beam. The ships suffered from only slight pitching and rolling, even in the heavy seas of the North Atlantic. Bismarck and Tirpitz were responsive to commands from the helm; they were capable of maneuvering with rudder deflections as small as 5°. With the rudder completely over, the ships heeled only 3°, but lost up to 65% of their speed. The ships handled poorly at low speeds or when traveling astern. As a result, tugs were necessary in confined areas to avoid collisions or grounding. The ships had a standard crew of 103 officers and 1,962 enlisted sailors, although the crew of Tirpitz expanded to 108 officers and 2,500 men by 1943.[20] The ships carried smaller boats, including three picket boats, four barges, one launch, two pinnaces, two cutters, two yawls, and two dinghies.[21]
Although both ships were from the same class, there were substantial differences between Bismarck and Tirpitz. The funnel cap on Bismarck was silver-grey, however the cap on Tirpitz was always black. The two cranes on Bismarck were sited 3.5 m (11 ft) further outboard and 3 m (9.8 ft) further aft, and Tirpitz mounted her two cranes on the superstructure deck. The 10.5 cm (4.1 in) flak guns (starboard II and port II) were mounted 5 m (16 ft) further inboard on Bismarck. When Bismarck was launched she had a straight stem, and Tirpitz had the Atlantic bow. Both ships had a degaussing coil fitted prior to commissioning. Bismarck had a single aircraft hangar on each side of the funnel and a double hangar at the base of the mainmast.[5] Tirpitz had two double hangars on each side of the mainmast base.[22] Four minesweeping paravanes were carried, two on either side of the aft superstructure deck. These were used in conjunction with the bow protection gear.[23]
Propulsion
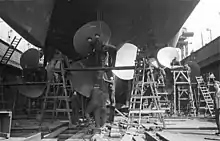
The Bismarck-class ships both had three sets of geared turbine engines; Bismarck was equipped with Blohm & Voss turbines, while Tirpitz used Brown, Boveri, and Co. engines. Each set of turbines drove a 3-bladed screw that was 4.70 m (15 ft 5 in) in diameter. The three-shaft arrangement was chosen over a four-shaft system, as was typically used on foreign capital ships, since it would save weight. At a full load, the high and medium-pressure turbines ran at 2,825 rpm, while the low-pressure turbines ran at 2,390 rpm. The ships' turbines were powered by twelve Wagner ultra high-pressure, oil-burning water-tube boilers. Bismarck and Tirpitz were originally intended to use electric-transmission turbines that would have produced 46,000 shp (34,000 kW) apiece. These engines would have provided for a higher top speed, but at the cost of greater weight. The geared turbines were significantly lighter, and as a result had a slight performance advantage. The geared turbines also had a significantly more robust construction, and so they were adopted instead.[1][24]
Both ships were rated for a top speed of 30 knots (56 km/h; 35 mph); Bismarck just exceeded this speed on sea trials, reaching 30.01 knots (55.58 km/h; 34.53 mph), while Tirpitz made 30.8 knots (57.0 km/h; 35.4 mph) on trials. This difference was largely the result of a significant increase in horsepower for Tirpitz, which reached 163,023 PS (160,793 shp; 119,903 kW), compared to 148,116 for Bismarck. The two ships had different fuel stores; Bismarck was designed to carry 3,200 tons of fuel oil, but could store up to 6,400 tons of fuel in a normal configuration; with extra fuel bunkers, the fuel carried could be increased up to 7,400 tons. Tirpitz was designed to carry 3,000 tons of fuel, and with additional bunkers, was able to store up to 7,780 tons. At 19 knots, Bismarck could steam for 8,525 nautical miles (15,788 km), and Tirpitz had a maximum range of 8,870 nautical miles (16,430 km) at that speed.[4]
Robert Ballard, the discoverer of Bismarck, noted that the adoption of the three-shaft arrangement caused serious problems for Bismarck. The center shaft weakened the keel, especially where it emerged from the hull. In addition to retaining greater hull strength, a four-shaft arrangement would have allowed a greater ability to steer the ship using only propeller revolutions than the three-screw system according to Ballard.[25] During Bismarck's Atlantic operation in May 1941, the ship's rudder was disabled by a torpedo hit, and her course could not be corrected by altering screw revolutions;[26] this problem had already been revealed during sea trials, but it could not be corrected.[27]
Electric power was provided by a variety of generators, including two electric plants of four 500 kW diesel generators, two electric plants each with five 690 kW turbo-generators, one at 460 kW generator connected to a 400 kVA AC generator and one 550 kVA AC diesel generator. The generators were manufactured by Garbe, Lahmeyer & Co.[28] The electrical plant provided a total 7,910 kW at 220 volts.[21]
Armament
Main battery
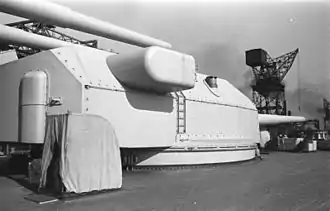
Bismarck's and Tirpitz's main battery consisted of eight 38 cm (15 in) SK C/34 guns in four twin turrets, Anton and Bruno in a superfiring pair forward of the superstructure and Caesar and Dora aft.[29] The turrets allowed elevation to 30°, which gave the guns a maximum range of 36,520 m (39,940 yd). The guns fired 800 kg (1,800 lb) projectiles at a muzzle velocity of 820 meters per second (2,690 ft/s).[30] The main battery was supplied with between 940–960 shells total, for approximately 115–120 shells per gun.[21] As with other German large-caliber naval rifles, these guns were designed by Krupp and featured sliding wedge breech blocks, which required brass cartridge cases for the propellant charges. Under optimal conditions, the rate of fire was one shot every 18 seconds, or three per minute.[31] The gun turrets were electrically trained and the guns were hydraulically elevated. Gun elevation was controlled remotely. The turrets required each gun to return to 2.5° elevation for loading.[32] Tirpitz was eventually provided with time-fuzed shells to combat the repeated Allied bombing attacks.[33]
The Bismarcks' use of four twin turrets (the 4 × 2 configuration) was a design practice that hearkened back to the First World War. Almost all other post-1921 capital ships had triple or even quadruple turrets, which allowed for additional heavy caliber guns, while reducing the number of turrets. Fewer turrets reduced the length of the battleship's armored citadel (particularly magazine length and the armor needed to protect it) and shortened the vessel itself. Although triple turrets were considered for the Bismarcks, there were concerns that the extra barrel would lower the overall rate of fire in each turret, along with fears that a single well-aimed hit could disable a larger proportion of the ship's firepower. It was also felt that four twin turrets allowed for a better field of fire and a more effective sequence of salvos.[34]
Secondary battery
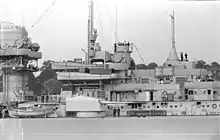
The ships' secondary battery consisted of twelve 15 cm (5.9 in) SK C/28 guns mounted in six twin turrets.[35] The 15 cm gun turrets were based on the single-gun turrets used aboard the Scharnhorst class. They could elevate to 40° and depress to −10°; they had a rate of fire of around six shots per minute.[33] The 15 cm guns fired a 45.3 kg (100 lb) shell at a muzzle velocity of 875 m/s (2,871 ft/s). At maximum elevation, the guns could hit targets out to 23,000 m (25,000 yd).[30] As with the main battery guns, Tirpitz's 15 cm guns were later supplied with time-fused shells.[33]
The decision to mount low-angle 15 cm guns has been criticized by naval historians, including Antony Preston, who stated that they "imposed a severe weight penalty", while American and British battleships were being armed with dual-purpose guns.[36] Naval historians William Garzke and Robert Dulin note that "the use of dual-purpose armament would have possibly increased the number of anti-aircraft guns, but might have weakened the defence against destroyer attack, which German naval experts deemed more important."[37]
Anti-aircraft battery
As built, Bismarck and Tirpitz were equipped with an anti-aircraft battery of sixteen 10.5 cm (4.1 in) C/33 65-caliber guns in eight twin mounts, sixteen 3.7 cm (1.5 in) C/30 guns in eight dual mounts, and twelve 2 cm (0.79 in) C/30 guns in individual mounts.[35] The 10.5 cm guns were the same weapons as used aboard the Scharnhorst class, and were mounted on the first superstructure deck. After Bismarck was sunk in 1941, two amidships guns on Tirpitz were moved forward so as to provide them with better fields of fire. The sixteen guns were guided by four fire-control directors, two just aft of the conning tower, a third positioned aft of the main mast, and the fourth directly behind turret Caesar. Tirpitz's directors were covered by protective domes, though Bismarck's were not.[38]
The ships' 3.7 cm 83-caliber guns were twin mounted and placed in the superstructure. The mounts were hand-operated and automatically stabilized for roll and pitch.[39] These guns were supplied with a total of 32,000 rounds of ammunition.[40] Bismarck and Tirpitz were initially armed with twelve 2 cm guns in single mounts, though these were augmented over time.[21] Both ships initially carried twenty-four thousand 2 cm rounds.[40] Bismarck received a pair of quadruple gun mountings, for a total of twenty 2 cm guns. Over the course of her career, Tirpitz's 2 cm battery was increased to 78 guns in single and quadruple mountings.[39] By 1944 she carried over ninety thousand 2 cm rounds.[40]
Torpedo armament
Bismarck had none, while Tirpitz was fitted with two banks of 53.3 cm (21.0 in) quadruple torpedo tube mounts between the end of 1941 and early 1942. Tirpitz carried 24 torpedoes.[40]
Armor
The armor plate was mainly Krupp cemented steel, which contained 0.34% carbon, 3.78% nickel, 0.31% manganese, and 2.06% chrome. This had two classifications, Ww for Wotan (soft) and Wh for Wotan hard.[41] The Bismarck-class ships had an armored belt that ranged in thickness from 220 to 320 mm (8.7 to 12.6 in); the thickest section of armor covered the central portion, where the gun turrets, ammunition magazines, and machinery spaces were located. This portion of the belt was capped on either end by 220 mm thick transverse bulkheads. The ships had an upper deck that was 50 mm (2 in) thick, and an armored deck that was between 100 to 120 mm (3.9 to 4.7 in) thick amidships, and tapered down to 60 mm (2.4 in) at the bow and 80 mm (3.1 in) at the stern.[4] The deck was mounted low in the hull, however, which reduced the volume of internal space protected by the armored citadel. This contrasted with contemporary British and American designs that featured a single thick armored deck mounted high in the ship.[19]
The forward conning tower had a 200 mm (7.9 in) thick roof and 350 mm (14 in) thick sides, while the range finder had an armored roof 100 mm (4 in) thick and 200 mm (8 in) thick sides. The aft conning tower had much lighter armor: the roof was 50 mm thick and the sides were 150 mm (5.9 in), while the aft range finder had a 50 mm thick roof and 100 mm sides. The main battery turrets were reasonably well-protected: the turret forward roofs were 180 mm (7.1 in) and roof rears were 130 mm (5.1 in) thick, the sides were 220 mm thick, and the faces were 360 mm (14 in) thick with 220 mm (8.7 in) thick shields.[4] These armor thicknesses were less than those of contemporary British (King George V) and French (Richelieu) designs. Conversely, the secondary battery was better-protected than most rivals.[42] The 15 cm gun turrets had 35 mm (1.4 in) thick roofs, 40 mm (1.6 in) sides, and 100 mm fronts. The 10.5 cm guns had 20 mm (0.79 in) shields.[4] The roof armour was 40mm (1.6 in).[41]
Regarding underwater protection, the armor was resistant to a 250kg TNT explosive charge. Armour depth was 5.5 meters (216.5 in), with the longitudinal bulkhead thickness being 53mm (2.1 in). Overall bottom protection had a depth of 1.7 meters (66.9 in). The citadel could resist a hit from a 38cm shell of a weight of 1,016kg fired from ranges between 10,793 meters and 21,031 meters for the machinery, and from 23,319 meters for the magazine.[43]
Construction
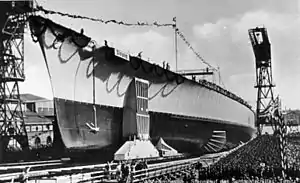
Bismarck was laid down at the Blohm & Voss shipyard on 1 July 1936.[35] The ship was assigned construction number 509, and the contract name Ersatz Hannover, since she had been ordered as a replacement for the old battleship Hannover.[4] The ship was launched on 14 February 1939 with Adolf Hitler in attendance. The granddaughter of the ship's namesake, Otto von Bismarck, christened the ship. As with other German capital ships, Bismarck was originally built with a straight bow. Experiences with other ships revealed the necessity of a clipper bow to prevent them from shipping too much water in heavy seas, so Blohm & Voss accordingly modified Bismarck's bow during the fitting-out process. The ship was commissioned into the fleet on 24 August 1940, with Kapitän zur See Ernst Lindemann in command. Three weeks later, the ship left Hamburg for trials in the Baltic Sea, before returning in December for final fitting-out work. Further trials and tests were conducted in the Baltic in March and April; Bismarck was placed on active status the following month.[44]
Tirpitz's keel was laid at the Kriegsmarinewerft (Kriegsmarine Shipyard) in Wilhelmshaven on 20 October 1936,[35] under construction number 128. She had been ordered under the contract name Ersatz Schleswig-Holstein to replace the obsolete battleship Schleswig-Holstein.[4] Tirpitz was named for Grand Admiral Alfred von Tirpitz, the architect of the High Seas Fleet before World War I. His daughter, Ilse von Hassel, christened the ship on 1 April 1939. Fitting out work lasted until February 1941;[45] Tirpitz was commissioned into the fleet on 25 February.[21] A series of trials were then conducted, first in the North Sea and then in the Baltic.[46]
Ships
| Ship | Builder | Namesake | Laid down | Launched | Commissioned | Fate |
|---|---|---|---|---|---|---|
| Bismarck | Blohm & Voss, Hamburg |
Reichskanzler Otto, Fürst von Bismarck | 1 July 1936 | 14 February 1939 | 24 August 1940 | Sunk following surface action, 27 May 1941 |
| Tirpitz | Kriegsmarinewerft, Wilhelmshaven |
Großadmiral Alfred von Tirpitz | 2 November 1936 | 1 April 1939 | 25 February 1941 | Sunk in air attack at Tromsø, 12 November 1944 |
Service history
Bismarck
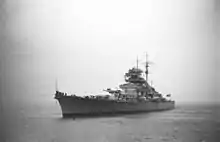
After Bismarck joined the fleet, plans were drawn up for a sortie into the North Atlantic, which was codenamed Operation Rheinübung (Rhine Exercise). The operation initially called for a force composed of Bismarck, Tirpitz, and the two Scharnhorst-class battleships. Tirpitz was not yet ready for service by May 1941, and Scharnhorst was being overhauled. The force was reduced to Bismarck, Gneisenau, and the heavy cruiser Prinz Eugen. Gneisenau was damaged by a British bombing raid on Brest, so it was decided that only Bismarck and Prinz Eugen would conduct the operation. Admiral Günther Lütjens was placed in command of the pair of ships.[47]
Early on the morning of 19 May, Bismarck left Gotenhafen, bound for the North Atlantic.[48] While on the trip through the Danish Belt, Bismarck and Prinz Eugen encountered the Swedish cruiser HSwMS Gotland in Kattegat; the sighting was passed through the Swedish Navy to the British naval attaché in Stockholm.[49] The British Royal Air Force conducted aerial reconnaissance of the Norwegian fjord in which Bismarck and Prinz Eugen had stopped, to confirm the sighting. While in Norway, Admiral Lütjens failed to replenish the approximately 1,000 long tons (1,000 t) of fuel Bismarck had spent on the first leg of the voyage.[50]
By 23 May, Bismarck and Prinz Eugen had reached the Denmark Strait. That evening, the British cruisers Suffolk and Norfolk briefly engaged Bismarck before dropping back to shadow the German ships.[51] At 06:00 the following morning, observers aboard Bismarck spotted the masts of the battlecruiser Hood and the new battleship Prince of Wales.[52] The British ships steamed directly towards Bismarck and Prinz Eugen, before attempting a turn to bring the two forces on a roughly parallel course. During the turn, at least one of Bismarck's 38 cm shells penetrated one of the aft ammunition magazines aboard Hood, which caused a catastrophic explosion and destroyed the ship.[53] There were only three survivors from Hood's crew of 1,421. The German ships then concentrated their fire on Prince of Wales, which was forced to withdraw. Bismarck did not emerge unscathed; a direct hit on her bow from Prince of Wales caused Bismarck to take in some 2,000 long tons (2,000 t) of water. The ship was also leaking oil, which made it easier for the British to track her.[54]
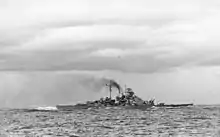
After retreating, Prince of Wales joined Norfolk and Suffolk; the ships briefly engaged Bismarck at around 18:00. Neither side scored a hit.[55] By this time, 19 warships were involved in the chase.[56] This included six battleships and battlecruisers and two aircraft carriers, along with a number of cruisers and destroyers.[57] After the second engagement with Prince of Wales, Lütjens detached Prinz Eugen to continue the operation while Bismarck sailed for port.[58] Shortly before midnight on 24 May, a group of Fairey Swordfish torpedo bombers from 825 Naval Air Squadron on Victorious attacked Bismarck. One torpedo struck the ship amidships, though without doing any serious damage. The shock from the explosion, coupled with Bismarck's maneuvering at high speed, damaged the temporary repairs that had stopped the flooding from the earlier battle damage. Her speed was reduced to 16 knots (30 km/h; 18 mph) to slow the flooding while repair teams fixed the reopened wounds.[59]
Early on 25 May, Bismarck doubled back past her pursuers in a wide circle. The maneuver successfully shook off the British ships, which turned west in an attempt to find the ship. Despite the maneuver, Admiral Lütjens was unaware that he had evaded the British, and so sent a series of radio transmissions, which were intercepted by the British and used to gain a rough fix on his position.[57] Due to the damage his ship had sustained, Lütjens decided to head for occupied France rather than continue his mission. On the morning of 26 May, a Coastal Command PBY Catalina flying boat spotted Bismarck 690 nmi (1,280 km; 790 mi) to the north-west of Brest; she was steaming at a speed that would put her under the protective umbrella of German aircraft and U-boats within 24 hours. The only British forces close enough to slow her down were the aircraft carrier Ark Royal and her escort, the battlecruiser Renown.[60] At approximately 20:30, a flight of fifteen Ark Royal's 820 Naval Air Squadrons Swordfish torpedo bombers launched an attack on Bismarck. Three torpedoes were believed to have struck the ship; the first two torpedoes failed to do serious damage to the ship, but the third hit jammed Bismarck's rudders hard to starboard. The damage could not be repaired, and the battleship began turning in a large circle, back towards her pursuers.[57]
An hour after the Swordfish attack, Lütjens transmitted the following signal to Naval Group Command West: "Ship unable to maneuver. We will fight to the last shell. Long live the Führer."[61] At 08:47 the following morning, the battleship Rodney opened fire, followed directly by King George V.[62] Bismarck replied three minutes later, though at 09:02 a 16-inch shell from Rodney destroyed the forward turrets.[63] Half an hour later, Bismarck's rear turrets were silenced as well.[64] At around 10:15, both British battleships had ceased fire, their target a burning wreck. The British were running dangerously low on fuel, but Bismarck had not yet been sunk. The cruiser Dorsetshire fired several torpedoes into the crippled ship, which then took on a severe list to port. At approximately the same time as Dorsetshire's attack, engine room crew detonated scuttling charges in the engine rooms.[65] There is still significant debate as to the direct cause of Bismarck's sinking. Only 110 men were rescued by the British before reports of U-boats forced them from the scene.[66] A further five men were rescued by German vessels.[67]
Tirpitz
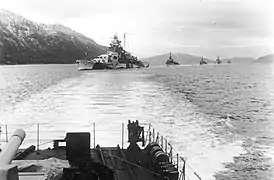
Tirpitz's first action following her commissioning into the Kriegsmarine on 25 February 1941 was to act as a deterrent to a possible Soviet attempt to break out their Baltic Fleet following the German invasion of the Soviet Union. The ship was joined by the heavy cruiser Admiral Scheer and the light cruisers Leipzig, Nürnberg, and Köln. The force patrolled off the Åland Islands for a few days before returning to Kiel.[68] On 14 January 1942, Tirpitz left German waters for Norway, escorted by the destroyers Richard Beitzen, Paul Jacobi, Bruno Heinemann and Z29,[69] arriving at Trondheim on the 17th.[70] The Germans used the ship as a fleet in being to tie down British naval forces to protect the convoy route to the Soviet Union and to deter an invasion of Norway.[71]
On 6 March, Tirpitz, escorted by the destroyers Z25, Friedrich Ihn, Paul Jacobi and Hermann Schoemann,[69] launched a raid on the British convoys to the Soviet Union.[68] The Germans attempted to intercept convoys PQ-12 and QP-8,[70] but the inclement weather prevented them from finding the convoys.[68] A Soviet freighter that was sailing independently of the convoys was sunk by the destroyers. The British submarines Trident and Seawolf reported Tirpitz. A Home Fleet squadron consisting of the battleships King George V and Duke of York, the aircraft carrier Victorious, the heavy cruiser Berwick and destroyers failed to find the Germans.[69] Victorious launched a strike of twelve Fairey Albacore torpedo bombers, however the aircraft were repulsed without having scored any hits on the German ships. Tirpitz and the destroyers were back in port by 12 March.[70] The close call prompted Hitler to mandate that Tirpitz was not to attack another convoy unless its escorting aircraft carrier had been sunk or disabled.[72]
The RAF launched a series of unsuccessful bombing raids against Tirpitz while she was moored in the Faettenfjord. The first on 30/31 January by seven Short Stirling of No 15 Squadron and nine Handley Page Halifax bombers of No 76 Squadron. Next came a raid by 36 Halifax bombers, took place on 30/31 March. On 27/28 April, Tirpitz was attacked by 26 Halifax bombers of No 4 Group and 10 Avro Lancasters of No 5 Group. This was followed on 28/29 April by 23 Halifaxes of No 76 Squadron and 11 Lancasters.[69] A combination of heavy German anti-aircraft fire and poor weather caused all three missions to fail.[68] Over the rest of the year and into late 1942, Tirpitz underwent a refit in the Faettenfjord, which lacked dockyard facilities of any type. As a result, the work was done incrementally; a large caisson was built to allow the rudders to be replaced.[73] Naval historians William Garzke and Robert Dulin stated that "the repairs to this ship were one of the most difficult naval engineering feats of World War II."[74]
In January 1943, Tirpitz emerged from the lengthy overhaul, after which she was transferred to Altafjord. Here, she participated in extensive training operations with Scharnhorst and the heavy cruiser Lützow, which lasted until the middle of the year.[75] On 6 September, Tirpitz, Scharnhorst, and the destroyers Z27, Z29, Z30, Z31, Z33, Erich Steinbrinck, Karl Galster, Hans Lody and Theodor Riedel bombarded the island of Spitzbergen, which served as a British refuelling station.[76] The two battleships destroyed their targets and returned safely to Altenfjord; this was the first time Tirpitz fired her main guns in anger.[77] On 22/23 September, six British midget submarines attacked Tirpitz while at anchor. Only two of the submarines, X6 and X7 successfully planted explosive charges against the battleship's hull. The first charge exploded at 0812, the second shortly afterwards. Very extensive damage was sustained; nearly all electric lighting failed, partial flooding of electric switchboard room 2, flooding of the double bottom and fuel bunkers on the port side. Structural damage in the engine plant of the housing and components of the port turbine and condenser; the tail shafts were out of alignment, the thrust bearing was damaged, the propelllers were immobilised, and the port rudder assembly was flooded. The main gun turrets had been jolted off their roller tracks, only one rangefinder was still active, one 15cm turret was jammed, three of four fire control centres were damaged, the aircraft catapult was inoperable and two Arado 196 floatplanes were seriously damaged. Casualties were light however, one dead and 40 wounded.[76] Tirpitz had been successfully neutralized.[75] Over the next six months, a workforce of some 1,000 men effected the needed repairs, which were finished by March 1944.[78]
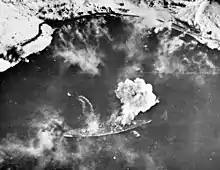
The British resumed the series of air attacks almost immediately after repairs were completed. On 3 April, the Royal Navy launched Operation Tungsten, during which 40 fighters and 40 Barracuda bombers from six carriers attacked the ship. They scored 15 direct hits and two near misses, which caused heavy damage, killed 122 men, and wounded 316 more. The Royal Navy attempted to repeat the attack three weeks later on the 24th, but had to call the operation off due to inclement weather. Operation Brawn, another carrier-launched attack, followed on 15 May, but again weather interfered. Another carrier strike was attempted on 28 May, but it too was cancelled due to poor weather conditions. Operation Mascot, which was to be conducted by the carriers Victorious, Furious, and Indefatigable on 17 July, was frustrated by the heavy smokescreen over the battleship.[79]
The Royal Navy launched the Operation Goodwood series in late August. Goodwood I took place on 22 August, with 38 bombers and 43 fighters from five carriers. The attackers failed to score any hits. Goodwood III followed two days later, with 48 bombers and 29 fighters from Formidable, Furious, and Indefatigable. The bombers made two hits on the ship, which did only minor damage. The last Royal Navy operation, Goodwood IV, followed on 29 August. Thirty-four bombers and 25 fighters, launched from Formidable and Indefatigable, attacked the ship, though fog prevented them from scoring any hits.[79]
The task of sinking Tirpitz now fell to the RAF, which performed three airstrikes armed with new 5,400 kg (11,900 lb) Tallboy bombs.[79] The first attack, Operation Paravane, came on 15 September, when a force of 27 Lancasters dropped a single Tallboy each; the bombers succeeded in hitting Tirpitz directly in the bow with one of the bombs. The bomb completely penetrated the ship and exploded directly under her keel. This caused 1,500 t (1,500 long tons; 1,700 short tons) of water to flood the ship; Tirpitz had again been disabled.[80] A month later, on 15 October, Tirpitz was moved to Håkøya Island off Tromsø to be used as a floating artillery battery. Two weeks later, on 29 October, the British launched Operation Obviate, which consisted of 32 Lancaster bombers. Only a near miss was achieved, though it caused Tirpitz to take in more water. The last attack, Operation Catechism, took place on 12 November. Thirty-two Lancasters attacked the ship and scored a pair of direct hits and a near miss. The bombs detonated one of Tirpitz's ammunition magazines and caused the ship to capsize. Casualties were high: 1,204 men were killed in the attack. Another 806 men managed to escape the sinking ship, and a further 82 were rescued from the capsized hulk.[70] The wreck was gradually broken up for scrap between 1948 and 1957.[81]
Notes
| Wikimedia Commons has media related to Bismarck class battleship. |
Footnotes
Citations
- Gröner, pp. 33–35.
- Garzke & Dulin, p. 203.
- Koop & Schmolke, p. 15.
- Gröner, p. 33.
- Koop & Schmolke, p. 16.
- Mulligan, pp. 1021–1023.
- Garzke & Dulin, pp. 204–205.
- Mulligan, pp. 1023–1026.
- Garzke & Dulin, p. 204.
- Mulligan, pp. 1026–1028.
- Maiolo, pp. 35–36.
- Mulligan, p. 1028.
- Mulligan, pp. 1028–1031.
- Garzke & Dulin, pp. 205–206.
- Mulligan, p. 1031.
- Garzke & Dulin, p. 206.
- Garzke & Dulin, p. 208.
- Mulligan, pp. 1042–1043.
- Preston, p. 151.
- Koop & Schmolke, p. 18.
- Gröner, p. 35.
- Koop & Schmolke, p. 17.
- Koop & Schmolke, p. 25.
- Mulligan, p. 1026.
- Ballard, p. 232.
- Garzke & Dulin, pp. 234–237.
- von Müllenheim-Rechberg, p. 39.
- Koop & Schmolke, p. 28.
- Gröner, pp. 34–35.
- Garzke & Dulin, p. 275.
- Garzke & Dulin, p. 274.
- Garzke & Dulin, p. 278.
- Garzke & Dulin, p. 279.
- Bercuson & Herwig, p. 33.
- Sturton, p. 44.
- Preston, p. 152.
- Garzke & Dulin, p. 297.
- Garzke & Dulin, p. 280.
- Garzke & Dulin, p. 282.
- Koop & Schmolke, p. 24.
- Koop & Schmolke, p. 22.
- Breyer, Battleships and Battle Cruisers, p. 300.
- Koop & Schmolke, p. 23.
- Williamson, pp. 21–22.
- Williamson, p. 35.
- Williamson, pp. 35–36.
- Williamson, p. 22.
- Bercuson & Herwig, p. 63.
- Bercuson & Herwig, pp. 65–67.
- Bercuson & Herwig, p. 71.
- Williamson, p. 23.
- Williamson, pp. 23–24.
- Bercuson & Herwig, pp. 147–153.
- Williamson, p. 24.
- Garzke & Dulin, p. 227.
- Garzke & Dulin, p. 229.
- Williamson, p. 33.
- Bercuson & Herwig, pp. 176–177.
- Garzke & Dulin, pp. 229–230.
- Garzke & Dulin, p. 233.
- Bercuson & Herwig, p. 266.
- Bercuson & Herwig, p. 288.
- Bercuson & Herwig, pp. 289–290.
- Bercuson & Herwig, p. 291.
- Garzke & Dulin, pp. 245–246.
- Williamson, pp. 34–35.
- Garzke & Dulin, p. 246.
- Williamson, p. 36.
- Koop & Schmolke, p. 61.
- Breyer, "Tirpitz", p. 25.
- Garzke & Dulin, p. 248.
- Garzke & Dulin, p. 253.
- Garzke & Dulin, p. 255.
- Garzke & Dulin, p. 256.
- Williamson, p. 37.
- Koop & Schmolke, p. 63.
- Garzke & Dulin, p. 258.
- Williamson, pp. 37–38.
- Breyer, "Tirpitz", p. 26.
- Williamson, p. 39.
- Sturton, p. 45.
References
- Ballard, Robert (2007). Robert Ballard's Bismarck. Edison: Chartwell Books. ISBN 978-0-7858-2205-9.
- Bercuson, David J. & Herwig, Holger H. (2003). The Destruction of the Bismarck. New York: The Overlook Press. ISBN 978-1-58567-397-1.
- Breyer, Siegfried (1973). Battleships and Battle Cruisers 1905–1970. New York: Doubleday.
- Breyer, Siegfried (1989). Battleship "Tirpitz". West Chester: Schiffer Publishing Ltd. ISBN 978-0-88740-184-8.
- Campbell, John (1985). Naval Weapons of World War Two. Naval Institute Press. ISBN 0-87021-459-4.
- Garzke, William H. & Dulin, Robert O. (1985). Battleships: Axis and Neutral Battleships in World War II. Annapolis: Naval Institute Press. ISBN 978-0-87021-101-0.
- Gröner, Erich (1990). German Warships: 1815–1945. Vol. I: Major Surface Vessels. Annapolis: Naval Institute Press. ISBN 978-0-87021-790-6.
- Koop, Gerhard & Schmolke, Klaus-Peter (2014). Battleships Of The Bismarck Class. UK. ISBN 978-1-84832-197-7.
- Maiolo, Joseph (1998). The Royal Navy and Nazi Germany, 1933–39 A Study in Appeasement and the Origins of the Second World War. London: Macmillan Press. ISBN 978-0-312-21456-2.
- Mulligan, Timothy P. (October 2005). "Ship-of-the-Line or Atlantic Raider? Battleship "Bismarck" between Design Limitations and Naval Strategy". The Journal of Military History. 69 (4): 1013–1044. doi:10.1353/jmh.2005.0246. S2CID 159780706.
- Preston, Anthony (2002). The World's Worst Warships. London: Conway Maritime Press. ISBN 978-0-85177-754-2.
- Sturton, Ian, ed. (1987). Conway's All the World's Battleships: 1906 to the Present. London: Conway Maritime Press. ISBN 978-0-85177-448-0. OCLC 246548578.
- von Müllenheim-Rechberg, Burkhard (1980). Battleship Bismarck, A Survivor's Story. Annapolis: Naval Institute Press. ISBN 978-0-87021-096-9.
- Williamson, Gordon (2003). German Battleships 1939–45. Oxford: Osprey Publishing. ISBN 978-1-84176-498-6.