Operation Caravan
Operation Caravan was a subsidiary of Operation Agreement under which four simultaneous raids were carried out against important Axis Lines of Communication positions in September 1942.
| Operation Caravan | |||||||
|---|---|---|---|---|---|---|---|
| Part of Operation Agreement, during the Second World War | |||||||
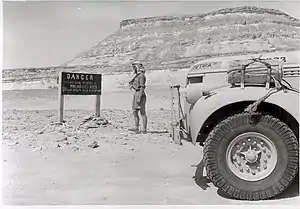
 Tutira III of T1 Patrol was driven by Captain Nick Wilder during the attack on Barce's airfield.[1] | |||||||
| |||||||
| Belligerents | |||||||
|
|
| ||||||
| Strength | |||||||
| 47 | Unknown | ||||||
| Casualties and losses | |||||||
|
Wounded: 8 Captured: 10 Missing: 2 Senussi of the Libyan Arab Force fate unknown. Vehicles destroyed: - 10 x 30cwt Chevrolets - 4 x Willys Jeeps[2] |
Killed: 4 Wounded:15 Captured: 1[2] Aircraft destroyed: 16 Aircraft damaged: 7[lower-alpha 1] Also Destroyed/damaged: Motorised Transport, military equipment, buildings (described in text). | ||||||
The operations were against Tobruk (Agreement), Benghazi (Bigamy), Jalo oasis (Nicety) and Barce (Caravan).[lower-alpha 2] Caravan was the only successful operation of the group.
As well as aiding in some of the operations, the Long Range Desert Group was to carry out the attack on the Italians at Barce, particularly the airfield there. To reach Barce, the force travelled 1,155 miles (1,859 km). One part of the force attacked the airfield claiming 35 aircraft destroyed, the other attacked the barracks.
Force and objectives
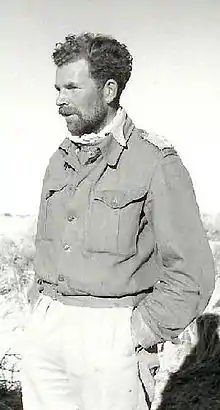
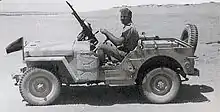
In early September 1942 B Squadron which consisted of two LRDG half-patrols under the command of Major John Richard Easonsmith,[lower-alpha 3] left their Egyptian base at Faiyum with orders to "Cause the maximum amount of damage and disturbance to the enemy". The destination was Barce, approximately 80 km north-east of Benghazi on the main coast road.[lower-alpha 4] This was a major administrative centre of the Italian colonial government of Libya and there was a large airfield on the north-eastern side of the town, which was to be the main target of the operation. G1 patrol, commanded by Captain J. A. L. Timpson, and T1 patrol, led by Captain N. P. Wilder, between them had a total of 47 men in 12 Chevrolet 1533X2 trucks and five jeeps.[7]
They were accompanied by Major Vladimir Peniakoff and his "spies", two Senussi tribesmen who belonged to the Libyan Arab Force. Arrangements had been made for the Senussi to gather information about enemy dispositions from friends living near Barce and report back to Peniakoff an hour or two before the raid.[8]
Italian forces in Barce

Opposing them in Barce were a company of the Polizia dell'Africa Italiana (the Italian Africa Police) with Autoblindo AB.41 armoured cars, a company of Carabinieri Reali (Royal Carabiniers), 8ª sezione Camicie Nere (8th Blackshirts section), XVII Battaglione Mitraglieri ("17th Machine-gun Battalion"), 10ª compagnia Carri L ("10th Light Tank Company") with L3/35 tankettes and a battery of 12.7 cm guns (captured British 60 pounder guns) of 51° Gruppo Artiglieria ("51st Artillery Group").
On the Barce airfield were the 35° Stormo da Bombardamento' ("35th Bombing Wing"), less a Squadriglia (squadron/flight), equipped with Cant Z.1007bis three-engined bombers, and 131ª Squadriglia of 66° Gruppo Osservazione Aerea (131st Squadron of the 66th Air Observation Group) equipped with Caproni Ca.311 twin-engined observation aircraft. Several other units of cavalry, Carabiniers and irregular Libyan-manned units were in the area.[9]
The journey to Barce

Because the LRDG was taking part in other operations it was essential to avoid congestion on the outer routes. The course chosen for B Squadron required a double crossing of the Sand Sea, an outward journey of 1,850 km (1,150 mi)[lower-alpha 5] Because the jeeps were "self supporting" for about 1,448 km (900 mi) and the Chevrolets for about 2,414 km (1,500 mi) they would be accompanied by two 10 ton Mack trucks of the "Heavy" Section which would supply all petrol for the first 322 km (200 mi). Another refill was supplied after the first week when B Squadron rendezvoused with two more trucks of the heavy section at a location called "Howard's Cairn".[10]
On the third day misfortune struck the Guards Patrol. Captain Timpson's jeep had rushed up a razor-back sand-dune and capsized over the top, forcing the evacuation of Timpson and his driver, Guardsman Thomas Wann, by a Lockheed Hudson.[lower-alpha 6] Sergeant Jack Dennis assumed command of G1 Patrol.[12]
The LRDG reached Benia, about 24 km to the south of Barce, on 13 September, and set up camp on a hill in a belt of trees; the 1,858 km journey had taken 11 days. One truck had been concealed at a rear rendezvous point "G5" along with small supplies of rations and water.[13] For the rest of the day the trucks were hidden amongst the trees while the men prepared their weapons and explosives; at 3 pm Major Easonsmith held a final briefing, assisted by Major Peniakoff who knew the layout of the town. T1 Patrol would attack the airfield, which was the main target, while G1 Patrol would create a diversion by attacking the main Campo Maddelena barracks, three km south-west of Barce, and the railway station to the south of the town.[14]
Unknown to the LRDG they had been seen en route and several alerts had been passed on to the Barce Sector Command. The commanding officer, General Piatti del Pozzo, ordered air and ground reconnaissance and made other preparations to counter the expected attack. Although the LRDG patrols were well camouflaged, and were confident that they had not been noticed amongst the trees, the unit had been spotted by a Caproni Ca.311 which dropped a message to a nearby Cavalry headquarters.[15]
At dusk the force moved out, cutting telephone wires on the way. Near the outskirts of the town they were challenged at a police checkpoint by a sentry who was disarmed and captured.[lower-alpha 7] An NCO who was lured out to investigate was shot and killed and the nearby buildings were attacked with several hand grenades, although it was later found that the guards had run away.[lower-alpha 8]

When the column of vehicles stopped suddenly during this exchange, T1 Patrol's Breda-carrying truck collided with the back of the wireless truck, wrecking its radiator; the truck had to be stripped and abandoned and the crew joined other trucks. While the wireless truck was able to continue the loss of the Breda's firepower was a setback to the unit. In addition a G1 Patrol vehicle wrecked its sump after hitting a rock and this too was stripped and abandoned. T1 Patrol's wireless truck separated from the column and parked in a field at Sidi Selim (about 12 km south-east of Barce) to act as a rendezvous point after the attack; this truck was also to keep a constant radio watch for messages from Lt Col David Stirling's SAS unit operating that night against Benghazi ("Operation Bigamy").
By 11pm the patrols reached a main road heading east to Barce and they went on with their headlights full on, pretending to be an Axis convoy. At the top of an escarpment leading to the Barce plains they came across two L3 tankettes parked guarding each side of the road. The LRDG vehicles opened up with heavy machine gun fire as they raced through. The tankettes were caught unprepared, although the crews should have known that night traffic had been forbidden. By midnight the LRDG were at the crossroads outside Barce and the two patrols separated to carry out their tasks. They were allocated two hours by Major Easonsmith who, with his two HQ jeeps, would proceed independently around Barce, looking for suitable targets. Major Peniakoff and the Guard's wireless truck stayed at the crossroads to deal with any attempts at stopping the LRDG's withdrawal.[14]
The airfield attack
To get to the airfield, which was to the north of Barce, T1 patrol skirted the eastern side of the town using the main road. They were passed by one Italian motorised unit with which friendly greetings were exchanged. As the unit approached the airfield Captain Wilder left his commander's jeep because he wanted to drive his old vehicle Tutira III; the others manning the truck were Troopers Parker and Holland. Near the airfield entrance the patrol was challenged by several sentries who were shot down; on reaching the airfield gates they were found to be shut but unlocked. Wilder opened the gates and the trucks drove through onto the airfield. The first target encountered was a truck and trailer unit carrying 52 cans of aviation fuel. Machine gun fire turned this into a fireball which illuminated much of the airfield, making it easier for the unit to find their way around.[17]
Although the Italians were expecting an attack, they did not believe that it would be possible to do so from vehicles coming from the main road. Instead, they had been preparing to counter foot-soldiers attacking from the south. As a consequence T1 patrol were able to mount their attack with little opposition. The next target was the concrete administration building which also housed the mess and barracks. Grenades were thrown through the windows, which started a blaze inside. A hangar and other buildings, as well as some motorised transport, were shot-up and a petrol dump of 44-gallon drums was destroyed.[18][19]
On the airfield proper T1 patrol headed clockwise in single file, shooting at parked bombers with a combination of tracer, incendiary and explosive ammunition. The firepower used by T1 Patrol was three pairs of .303 cal air-cooled Brownings, two .50 cal Vickers heavy machine guns and twinned and single.303 cal Vickers Ks, all of which used swivel mountings either in the back tray of the truck or on the passenger's doorpost.[20] In addition to this firepower Corporal Merlyn Craw of T1 patrol had devised a small incendiary time-bomb made out of "Nobel's Gelignite" (also known as "808"). Craw and Yealands were in the last vehicle in the column, Te Paki III, which had a box full of the bombs. As they came to an aircraft which was not already burning the two men jumped off and ran to each aircraft, placing a bomb on top of a wing, above the fuel tanks. Corporal Craw started the fuse going and both men then had to dive to the ground as the aircraft exploded in flames. Merlyn Craw:
I started off with 13 bombs and I had got rid of 11 of them. Despite what was going on all around me I was too busy doing my job to worry about fear...Of the two bombs left, one had a broken safety fuse. So we joined them together and placed them on a small single-engined plane [ a German Fieseler Storch in Italian service]...the small plane was blown to bits![21]
At least ten aircraft were destroyed in this way; Craw and Yealands escaped entirely unscathed.
Although T1 patrol spent about an hour on the airfield, none of the New Zealanders had been hit and none of their vehicles had been put out of action. The LRDG drivers were skilled at manoeuvering at high speed, thus making their vehicles difficult targets, while at the same time the gunners were capable of keeping up an accurate and heavy concentration of fire. Another possible factor in the lack of damage to the unit was that the numerous anti-aircraft guns defending the airfield had been unable to fire horizontally along the ground.[22]
An after-action report written by Captain Wilder observed that the Italians were;
...waiting for us, but they seemed to be very panicky and their fire was very wild.[23]
Based on Wilder's report it was thought that T1 patrol had destroyed or damaged 32 aircraft, mainly bombers. Official Italian figures quote 16 aircraft destroyed and seven damaged.[24]
Aftermath
After the attacks, the two patrols met up at the rallying point. By that point ten men, three trucks and a jeep had been lost. Before dawn on 14 September, near the police post to the south of Sidi Selim, the LRDG came under fire from the enemy who had been waiting. Three men were injured and a truck damaged to the extent it had to be towed. The truck and two others damaged earlier were abandoned – after transferring the stores – with timed explosives to destroy them.
The force continued the return until another vehicle broke down. The force was spotted by the enemy and attacked from the air until dusk fell. By that point all but one truck and two jeeps had been destroyed.
Ten members of the force set out to walk to Bir el Gerrari where a vehicle had been left. The force doctor took the remaining truck and a jeep with the wounded. Although they abandoned the jeep along the way, they reached Bir el Gerrari on 15 September and then a landing ground near the Kalansho Sand Sea, where they found another LRDG patrol. The RAF then evacuated the wounded to Kufra.
Another party of fourteen set out walking with their rations and water carried on the other Jeep. After about eighty miles, on 17 September, they met LDRG patrol S2. Searches of the area found eight of the first walking party. The two missing members had fallen behind and, not expecting to reach the rendezvous, turned north. On the 20th they found an Arab camp and they were taken prisoner by the Italians. By that point the two had covered over 150 miles on foot.
Another LRDG patrol (S1) picked up two members of the raiding force who had walked out of Barce.
For their part in the operation, there were a number of awards: Easonsmith and Wilder were awarded the DSO; Lawson the Military Cross; and Craw, Tippett, and Dobson the Military Medal.
References
Notes
- Footnotes
- Official Italian statistics; according to LRDG reports at least 32 aircraft were either destroyed or disabled during the airfield attack.[3]
- The names usually given to these operations – Daffodil, Snowdrop, Tulip, and Hyacinth were names made up by the author of a book published in 1945, when the official names of the operations were still secret. Since then it has often been assumed that the "flower" names were the correct ones.[4]
- John Richard Easonsmith MC DSC, 140546, Royal Tank Regiment, Royal Armoured Corps, was second in command of the LRDG and commander of B Squadron.[5]
- The town, called Marj in Arabic, was devastated by a major earthquake in 1963. A new city, now with a population of some 120,000, was built some 5 km away.[6]
- The LRDG measured distance using the metric system, a convention which will be followed in this article.
- This was done from a remote location, marked by a 1.5 metre tall marker called "Big Cairn" about 700 km south-east of Barce.[11]
- This sentry, a native of Tripoli, was adopted by the LRDG as an assistant cook and mess hand. Hamed, as he became known, was delivered to his home near Tripoli by the LRDG in March 1943.
- This was the cavalry unit headquarters which had earlier been warned by the reconnaissance aircraft of the presence of the enemy trucks.[16]
- Citations
- O'Carroll 2005, p.54.
- O'Carroll 2005, pp.116–117.
- O'Carroll 2005, p.62.
- O'Carroll 2005, pp.25–26
- O'Carroll 2005, pp.26, 156.
- Marj Retrieved: 1 April 2008
- O'Carroll 2005, p.26.
- O'Carroll 2005, p.38.
- O'Carroll, 2005, pp. 42–43
- Public Record Office 2001, pp.169–170.
- O'Carroll, 2005, pp. 32–35
- O'Carroll 2005, p.74.
- O'Carroll, 2005, pp. 35–36
- O'Carroll 2005, p.51.
- O'Carroll 2005, pp.45–46.
- O'Carroll 2005, p.46.
- O'Carroll 2005, pp.54–55.
- O'Carroll 2005, p.55.
- Wynter 2001, p.171.
- O'Carroll 2005, p.60
- O'Carroll 2005, pp.58–59.
- O'Carroll 2005, p.63.
- O'Carroll 2005, p.61.
- O'Carroll 2005, p.62
Bibliography
- Jenner, Robin; List, David; Badrocke, Mike. The Long Range Desert Group 1940–1945: New Vanguard 32. Botley, Oxford UK: Osprey Publishing, 1999. ISBN 1-85532-958-1
- O'Carroll, Brendan. Bearded Brigands: The Diaries of Trooper Frank Jopling. Wellington, New Zealand: Ngaio Press, 2002. ISBN 0-9582243-2-3
- O'Carroll, Brendan. The Barce Raid. Wellington, New Zealand: Ngaio Press, 2004. ISBN 0-9582243-8-2
- O'Carroll, Brendan. The Kiwi Scorpions. Devon, UK: Token Publishing Ltd, 2000. ISBN 1-870192-41-9
- Public Record Office War Histories (Wynter, H W, Brigadier). Special Forces in the Desert War 1940–1943. Kew, Richmond, Surrey UK: Public Record Office, 2001. ISBN 1-903365-29-5
External links
- NZETC, University of Wellington article on Barce raid Retrieved: 6 March 2009.
- Website of the Long Range Desert Group Preservation Society
- Another LRDG site with background information on vehicles and equipment, and an extensive bibliography.
- LRDG 1940–43, Exploits in the desert with extensive information on weapons, personnel, and equipment. (Also includes detailed annotated bibliography.)